
Note: We recommend professional installation for all parts. All parts are installed at your own risk. If you notice the part is considerably off, please do not drill or modify in anyway, please take photos and start a customer service claim here. We monitor our customer service claims constantly between the hours of 10AM-4PM PST Monday-Friday.
Front Bumpers / Rear Bumpers:Before you start, please make sure you have the proper safety equipment to avoid potential harm to you and your vehicle.
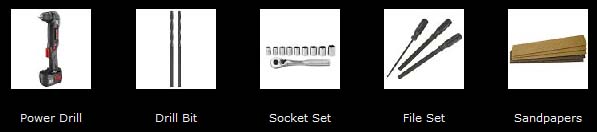
Body kit installation can relatively be an easy process; anyone with a little mechanical knowledge should be able to install parts in a few hours. Tools are also very standard, and if you have taken your factory bumper before, replacing it with an aftermarket piece should be no trouble at all.
- Inspect bumper for all bolts, screws and clips holding the bumper to the rest of the vehicle. (Make sure to have the proper tool for disassembly)
- Proceed to remove all fasteners and the actual bumper or bumper cover.
- As you start to test fit the new bumper, please make sure to inspect the section where the part will be place to make sure nothing interferes with the installation (i.e. hanging wires or hoses and splash shields, etc.)
- Carefully proceed to install the new bumper, making sure that there is no interference from other components on the vehicle.
- Some installation will require removal or repositioning of factory components, like impact absorbers, reinforcement bars, horns or fog lights. If any component is interfering with the installation, remove these components and proceed with test fitting the bumper (Make sure to reinstall all vital components back in its place or new location. Some products are meant for show and off-road purposes only. Removal of any factory safety components are at your own risk. )
- Most aftermarket bumpers are mounted the same way as the factory bumpers, so drilling the right hole in the proper location is key to having a good installation.
- With the bumper mocked up in place, make sure it lines up properly with rest of the panels and lights of the vehicle. (Some areas of the bumper are purposely made with extra material to lower the risk of damage during transit. Some bumpers might need to be shaved or filed down in some areas to insure a good fitment.)
- When you are satisfied with the fitment, mark the holes needed for the installation and cut or drill accordingly. (Be very precise in marking holes, as this will determine the accuracy of the fitment to the other panels of the vehicle)
- After holes have been drilled, your part is now ready to be prepped for paint. Because of the characteristics of FRP composites, you would need to block (sand and fill, etc.) the whole bumper to ensure smooth and even application of paint.
- After the paint has dried, you are ready to install the bumper on to the vehicle. After part installation onto vehicle, you may wet sand the clear coat then buff to achieve the shine.
- Check all other components that need to be attached to the new bumper. If other existing factory parts are vital and will not attach to the new bumper, you will have to fabricate brackets or mounts to secure those parts.
- Check if everything is secure and all parts installed. And you are done!
Before you start, please make sure you have the proper safety equipment to avoid potential harm to you and your vehicle.
Body kit installation can relatively be an easy process; any one with a little mechanical knowledge should be able to install parts in a few hours. Some side skirt installation might require the wheels off, so be prepared with a lift or jack stands.
Another aspect of installation to point out is the factory rocker panel or rocker moldings. Some installs will require removal or these panels and some will require the panels to be installed. This is very important since some vehicles might not come with these panels and will require it to be purchased from the dealer. So consult with your distributor for the requirements needed for installation.
- Mock up the side skirt to see if it's going to install properly. If the factory rocker panel is interfering with the installation, you are going to have to remove it. If the side skirt looks like a little short at the edges (where it wraps around the wheel well), you might be able to shave a little bit off the corner of the side skirt for a proper fit.
- Install the side skirt using screws on each end right where it wraps around the wheel well. This is the part where you might need to lift the car and take the wheels off.
- There are also a few other places to secure the side skirt, and this will depend on each individual style and application. Some might require screw on the factory rocker panels, the actually door jamb or anywhere else that is not visible when you have the doors closed. Some side skirts will have concave indentations for using rivets and filled over with body filler.
- After completing installation check door clearances to ensure paint will not rub.
Before you start, please make sure you have the proper safety equipment to avoid potential harm to you and your vehicle.
Installing an aftermarket fender is one of the more difficult tasks as far as body kit installation goes. The installer must have knowledge of basic auto body panel alignment and adjustment. If you don't think that you are up for the job, a professional technician might be needed for proper alignment.
- Inspect the factory fender thoroughly. Make sure to check alignment and distance from adjacent panel as you will try to get the aftermarket fender to fit in exactly the same way.
- Remove the factory fender and splash shield. This task might involve removing adjacent panels like front bumper and rocker panels.
- Mock up the aftermarket fender and try to get it aligned as close to the original fender location as possible. Some aftermarket fenders might need shaving and/or bending to get proper fitment. If you are not confident in doing so, this will be a good time to take it to a professional.
- After checking fitment, drill holes to align with all the factory bolts from the original fender. You might also need to attach a few extra screws to get the proper fitment.
- Install aftermarket fender and splash shield, along with the rest of the parts that was uninstalled during the process. In each step. Make sure to double check the fitment, as it may change.
- Check door and hood clearances, and make sure all fasteners are secure. And you are done!
Before you start, please make sure you have the proper safety equipment to avoid potential harm to you and your vehicle.
FRP Composite/Carbon FRP Composite hood installation can relatively be an easy process; anyone with a little mechanical knowledge should be able to install parts in a few hours. Tools are also very standard, and if you have taken your factory parts before, replacing it with an aftermarket piece should be no trouble at all.
- Remove factory hood from the bolts at the end of the hinges. (Do not remove the hinges)
- Install new aftermarket hood by reverse process.
- Tighten bolts to just enough torque to hold the hood in place, but lose enough to be adjusted by a tug.
- Remove hood latch and check alignment.
- If the hood is not aligned properly, adjust accordingly and tighten bolts at the hinges.
- Re-install hood latch and adjust for fitment. (If the hood is latched but not fully close, the latch might need to be adjusted shorter. If the hood does not latch down, the latch might need to be adjusted longer.
- Check for fit and you're done.